ROLF HEDT’S GLEANER MODS

-
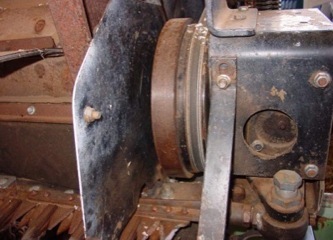
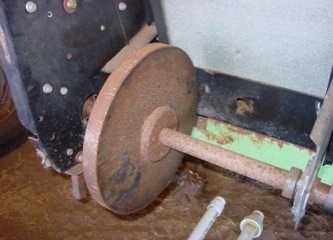
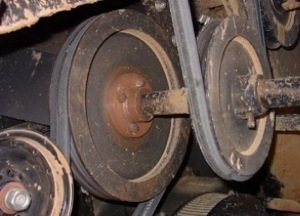
 Wobble box flywheel pulley - Is a 40 lb lump of steel that has been machined down to fit in the space that is available. It has a small lip that fits in to the pulley which was machined out to accepted the lip and to help keep it all in place on the pulley. There are three small grade 8 bolts that holds the flywheel on to the pulley and a large enough hole in the centre of the flywheel to accept a socket spanner to allow you to take the nut off when taking the pulley off or on. Using the flywheel on the wobble box has made a large difference to the reliability of the box belt (4000 ac since it was last replaced!!) the box run's very smooth with flywheel installed with less knife breakage! I actually had Mr John Keller from AGCO a few years ago stand in front of our machine in our shed and we ran the machine with front on and at high idle. we had placed a large bowl of water filled to the brim, in the centre of the front just behind the cutter bar. I think Mr Keller was most impressed. (Still not sure why they haven't made them standard.) All I can say is just do it. It will pay for it self in belts alone. PS: this idea will work on any colour machine.
-
PTO drive flywheel - The flywheel that comes with most of the flex fronts is not big enough and they have silly set screws holding it on the shaft. Anyone that has looked at their pto splines, will after a few seasons see that they are getting a little on the tired side, but if you install this pto large flywheel you will most likely not have to replace that spline for the life of the machine. For vari speed pulley's down there I would think it would help with keeping is in better shape as well. Just make sure that you install the pto flywheel with a weld-in taper lock as these will not vibrate loose, and they are simple to remove to take it to your next combine.
-
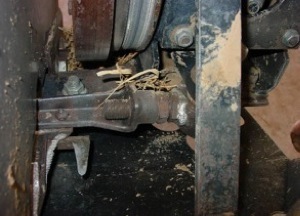
Wobble box skid plate - I don't know about you guy's that harvest soybeans, but most of these mods we have done have come about because of lentils which are very small and usually lie flat on the ground. The wobble box skid plate takes a lot of the main strain in holding the cutter bar from moving left and right with the stroke of the knife and the stabilizer bar underneath the wobble box skid plate takes a fair pounding, so the we install the rib you see in the picture from the other side of the stabilizer bar mounting point right through to the outside edge of the skid plate underneath the wobble box. This will help to strengthen the skid plate from bending in the middle.
-
The picture below we have tilted the cutter bar slightly up at the rear. This helps a little picking up our very low lentils. It has also been done to keep the knife stroke all in line.
-
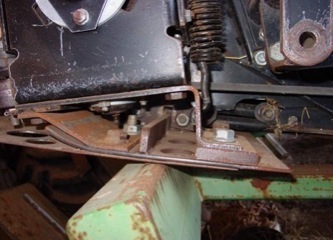
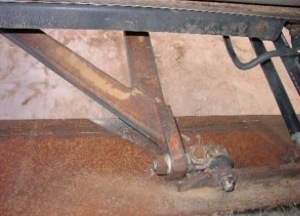
Beefed up stabilizer bar - Just an indication of what we have done to strengthen the stabilizer bar as we were breaking this on a regular basis. It's made up of two pieces of RSH steel tube we welded on to the stabilizer tube which in turn has had both ends of it bored out so it will accepted two "wear resistant bushes" on each end and a ram shaft steel stabilizer bar was machined up instead of the mild steel one because the carbon fibre bushes were worn with dirt, picking up the tiny little hole in the mild steel shaft and wearing out in less than 400 acre. Since we have done this mod we haven't touched the bushes for over 3000 to 4000 acre's.
.Here, is the stabilizer bar that we have beefed up somewhat. In the first year that we got the R62 (94) flex 500 we had heaps of problems with standard stabilizer breaking up, and as all sizes of flex headers had the same stabilizer, we thought that it need some sight upgrading to take the 30 ft header cutter bar loads. The bolt between the ball joint and stabilizer bar nut is for any small back and forward out of alignment troubles that we were having with the rise and fall of the cutter bar.


-
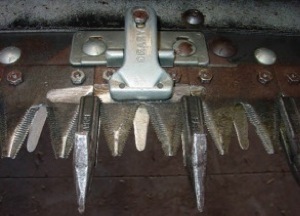
Cutterbar Setup - The couple of shots to the right are both of how we have the knife set up. Double cut knife, no choke fingers and spring loaded holed downs. This system works very well in our cereals, oil and pulses crops, and we have no trouble with the knife as we have a 40 lb flywheel on the wobble box driven pulley. This helps with keeping the momentum going when cutting tough green material.
-
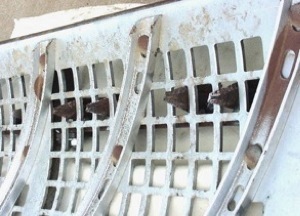
Cutterbar Head - The knife head has been re-engineered. So that it is pushing and pulling the knife straight to keep all the load inline with the knife. You can see the size of the flywheel in the bottom picture. We have the first three wear plates near the knife head, that are behind the knife, set right back against the cutter bar, so as to let the head swing in its slight arc that the wobble box knife head swings.
-
Tool & fire extinguisher holder - Just an idea on were we have our tool box and a water filled pressurized fire extinguisher. Harvest is usually done when everything is stinking hot (30 to 40 degree's C) and humidity around 5 to 20 %, so it doesn't take much to have a fire on your hands. The reel you see on the front is a home made lentil reel for getting the very short lentils in to the front.
-
Air Cleaner and Exhaust Extensions - The air cleaner extension is a must in dusty or chaffey conditions. We made ours so it would stick up just above the grain box so as to get good clean air for 360 degrees. Obviously we had to extend the exhaust up above the air in take so as not to oil up the cylinders on the engine. ( if you suck exhaust smoke back into engine you do get problems with blow by in the engine after some time) The Agco air cage extension that you can get works good too, but if you happen to leave the hood up as you back out the shed, it does tend to leave a lasting impression on the Agco air take inlet. where as with the air intake extension shown the hood does not have an effect on it. Also, having the exhaust extended stops you getting a gut full of smoke when you climb up into the back of combine with engine running.
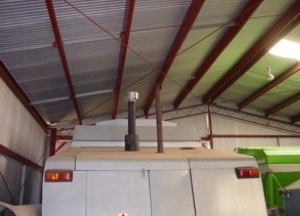
This simple mod has extended our air cleaner service intervals to once per season were as before we had to check it every time we changed crops. The silver thing on top has a mechanical spinner inside that spins around using the air flow to spin it, the outer casing has a slot on one side to let chaff and dust out. Works very well.
-
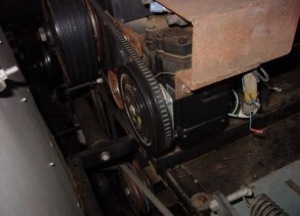
Air conditioner relocation - We moved our Air-con compressor away from the top of our Cummins engine so as to let the air compressor have more of a chance of keeping air compressors cylinder head temp down. We moved it to were the Deutz engine combine have theirs, we got our main engine pulley machined up to take a A section belt so as then we can drive the compressor straight from there. One of the benefits of moving the compressor has been easier services and more reliable air-con, plus we think the main radiator has less restriction! and engine runs a little cooler.
-
Air Manifold Head - For low yielding crops. (This is coming a bit of a common look around here.) Air front blower and drives. (And yes we are doing some repairs! Three eyeballs on upper links had broken! Must have had too much weight on the head trying to get lentils that just weren't there.)

-
Idler bearing replacement - Need to replace bearing in idlers? Just grind the rivets away and replace bearing with high quality bearing and bolt back together with 5mm bolts, spring washers and nuts. A lot cheaper than buying a new one.
-
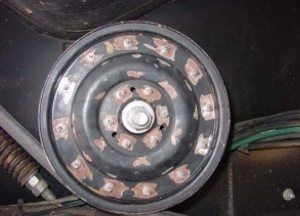
Clean grain and returns slowdown pulley - Here we have a double B section pulley that is from a L2 table auger drive. We had a centre bush made up and now our clean grain and repeats are running about 24 % slower. (Should Handle 80 ton per hour.) We had to speed up the rotor spinner a bit with a larger pulley on the repeats.
-
Knives in cage - Theory of these was to help rip apart the marterial like the peg bars that were used with the N series Combines, but use a lot less HP. They do make a difference to the rotor loss, but we think we need to place another set of knives around the front bottom side of the separator section to help some more with rotor loss. All they are are the double cut knife section (3 inch knife sections that have two blades on them) We have cut them in half down to one section and bolted them on to the peg bars that have been made out of mild steel (they bend, not break - hopefully!) We had to drill through the cage rib (have some spare drill bit's on hand!!!) to mount them and they can be adjusted in or out depending on crop conditions. (yep another adjustment).